Xhorse Dolphin XP-005 “Error: 56”“error code: 6” Solutions
Question:
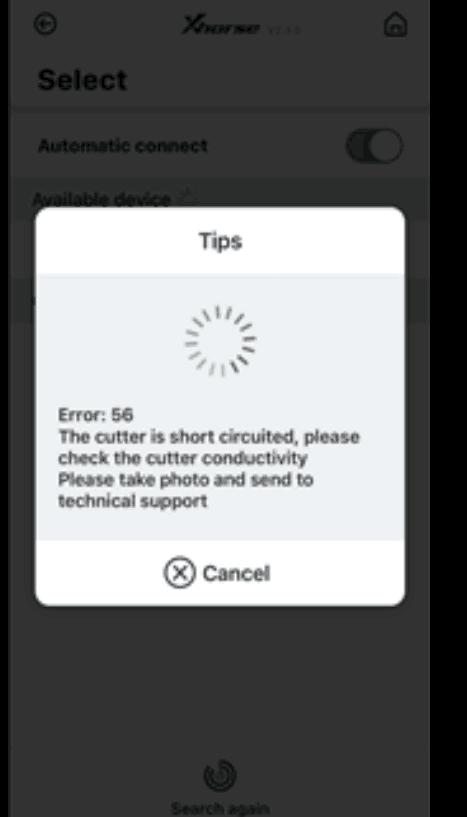
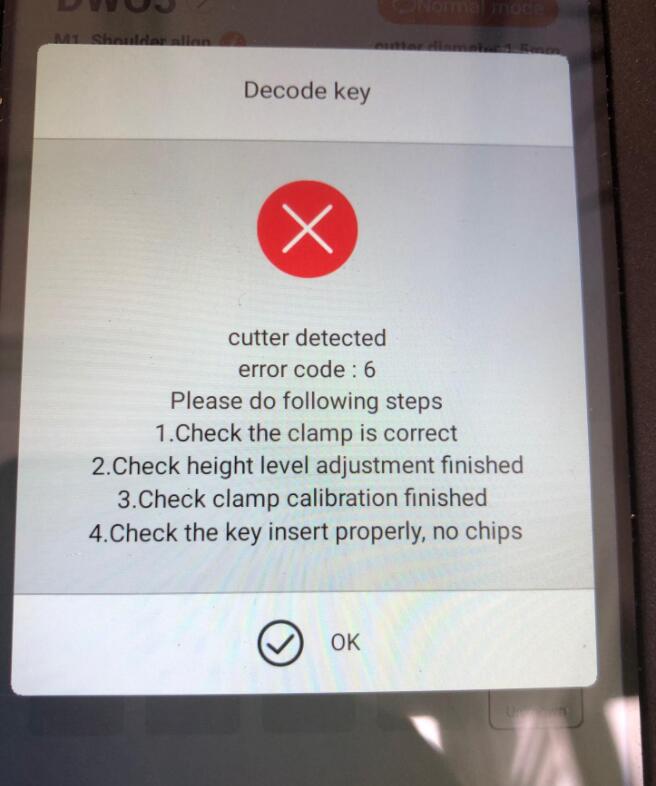
Xhorse Dolphin XP005 prompts “Error: 56” and “error code: 6”. Have shot and sent the video of electrical conductivity measurement, please check.
Solutions:
Check the steps as the prompts. (height level adjustment, clamp calibration etc.)
Do the electrical conductivity measurement.
If the cutter and the probe don’t conduct, disassemble the machine and test abnormal conductivity of the cutter/probe.
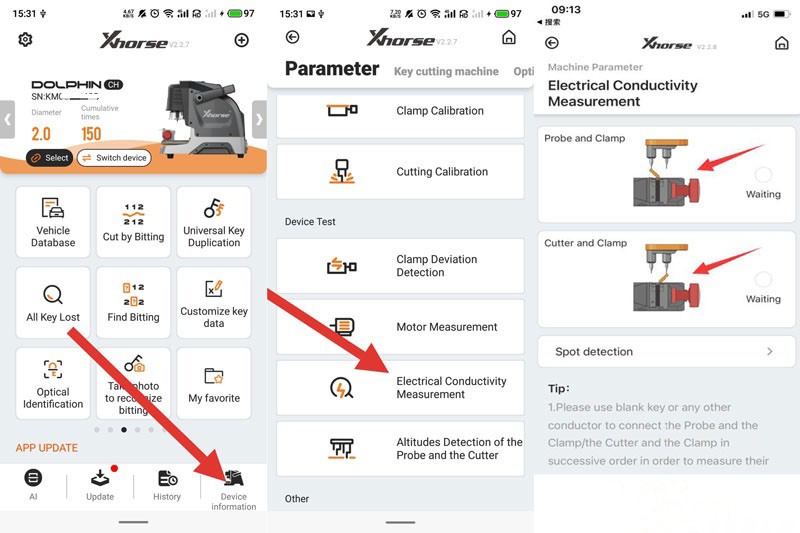
How to do electrical conductivity measurement?
Go to Xhorse app.
Device information>>Electrical Conductivity Measurement
1)Probe and clamp
2)Cutter and clamp
Use a blank key or a conductor to short-circuit the clamp and the probe/cutter as the prompt.
How to test abnormal conductivity of the cutter/probe?
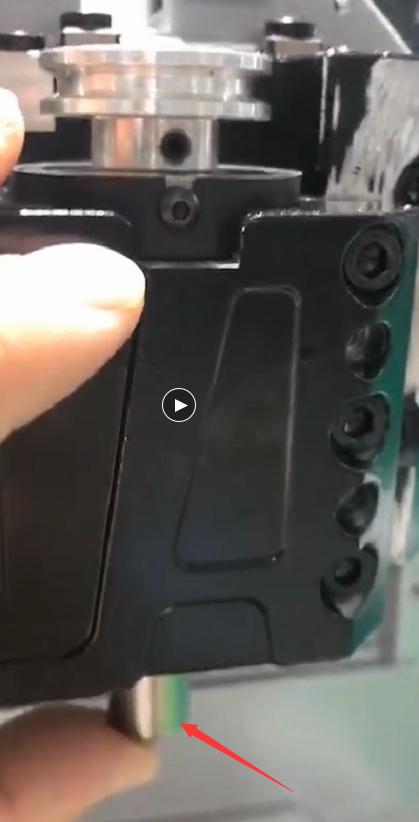
Step 1
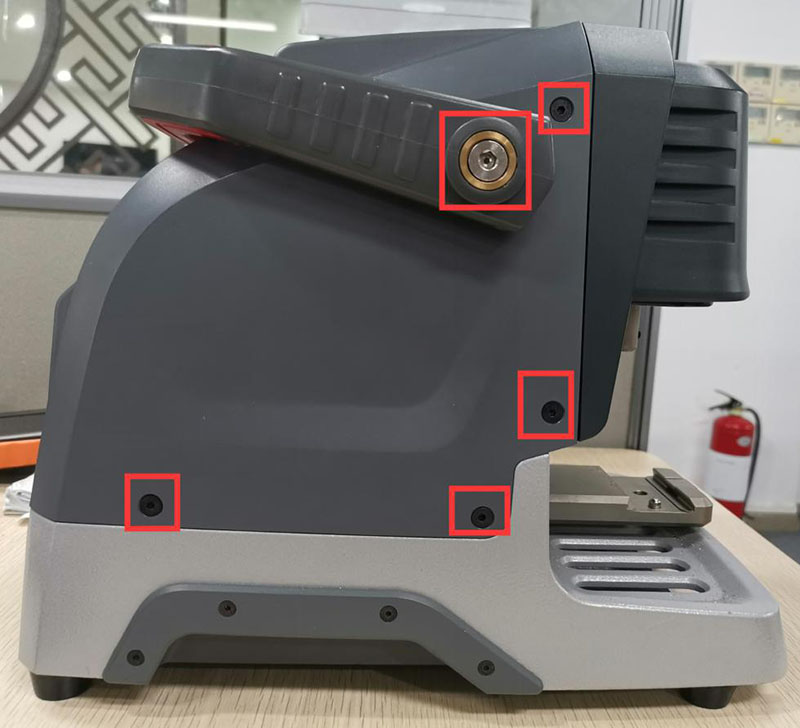
Unscrew the back of Dolphin XP-005, and watch the cables inside.
Step 2
Remove the back.
Unscrew the cable and the two Phillips screws.
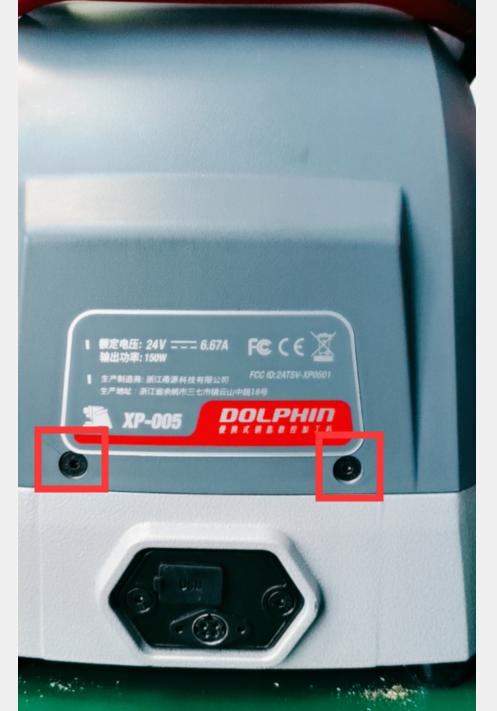
Turn to the front side.
Unscrew the little rubber cover, and at behind are screws.
Then unscrew the long metal by a hexagon bar wrench.

Step 3
Use a slotted screwdriver to turn the screw so that the Z-bearing and the outer cover are in the same horizontal plane.
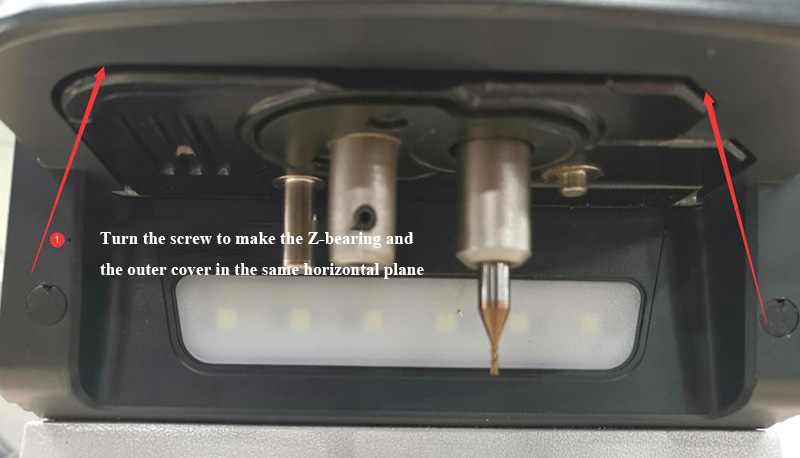
Take down the outer cover of the Z-bearing after the adjustment.
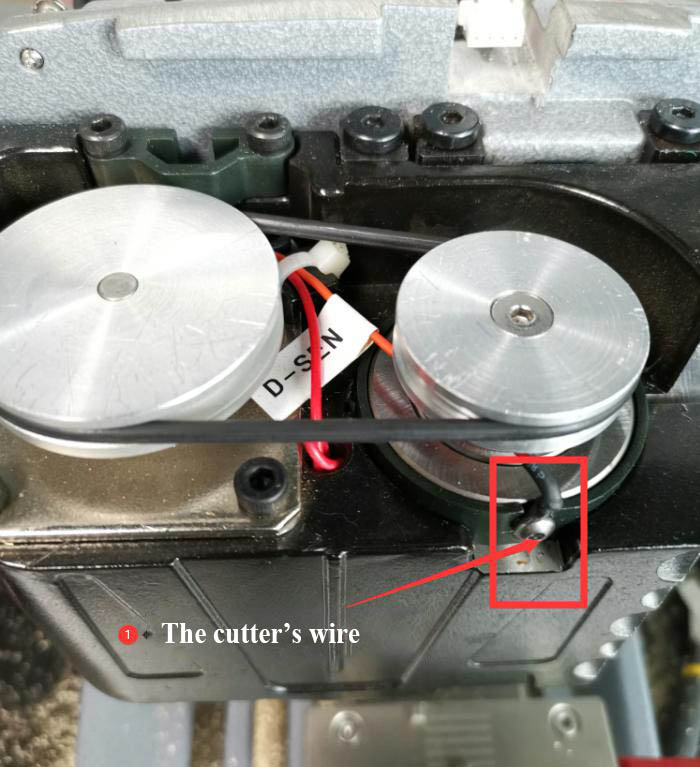
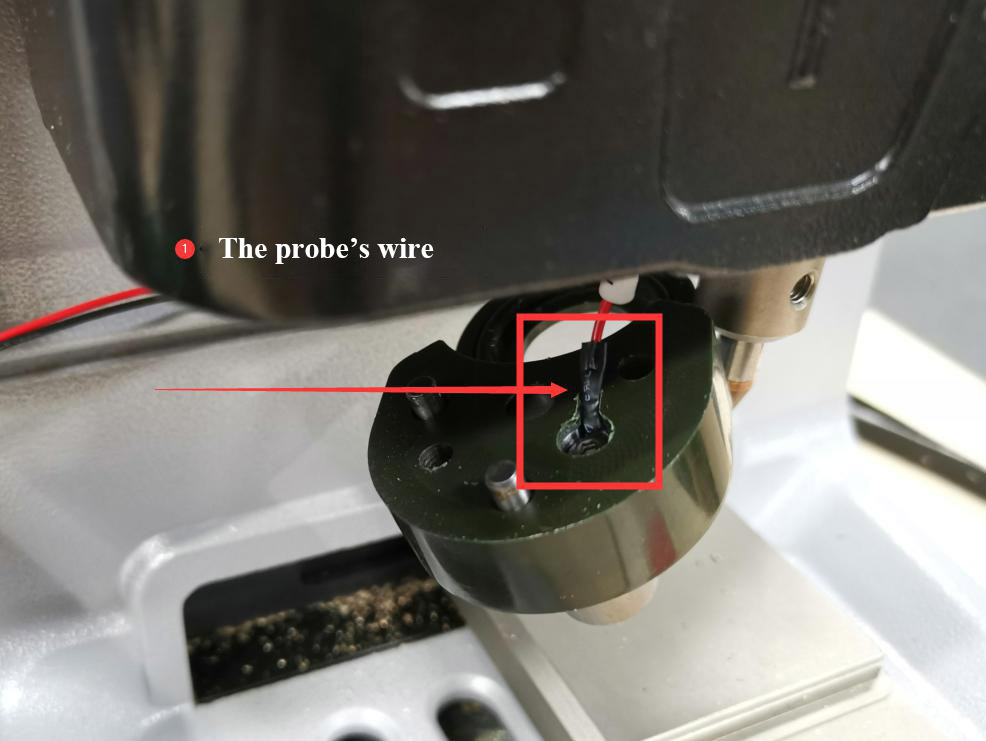
Unscrew the screws beside the probe.
Care the wire inside when removing the base.
Step 4
When the above steps are complete, now we can test whether the cutter’s wire and the probe’s wire are circuited or short-circuited.
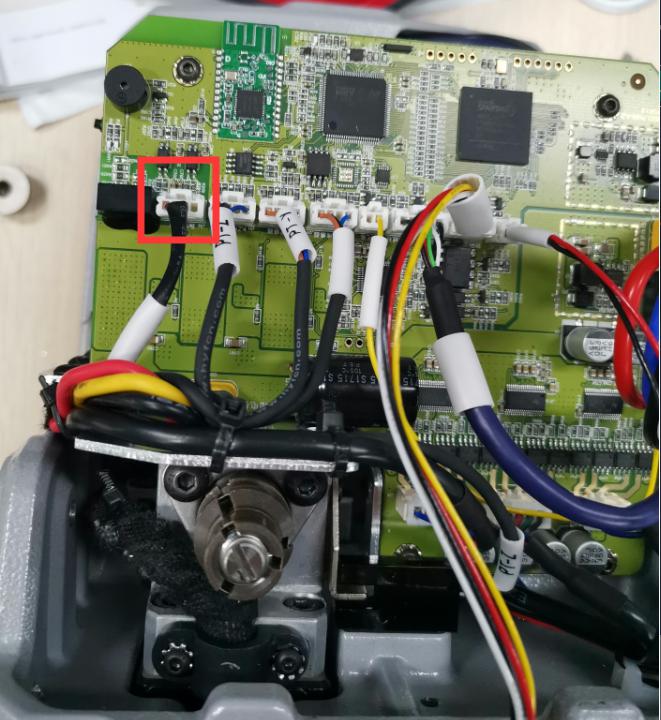
The wires should be tested together with wires in the power board.
Unplug and plug the wire in the power board again before we test if the conductivity is normal.
Step 5
This step is to test the cutter’s conductivity.
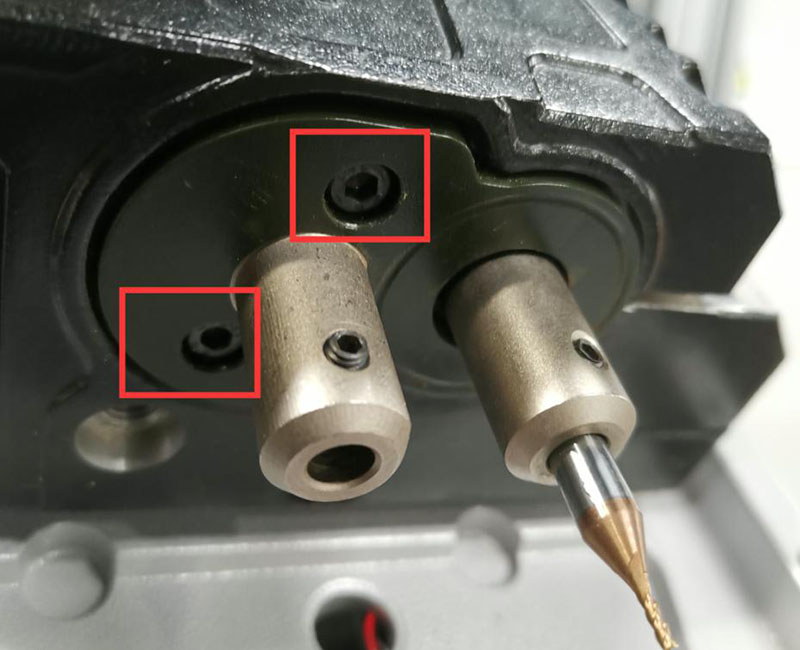
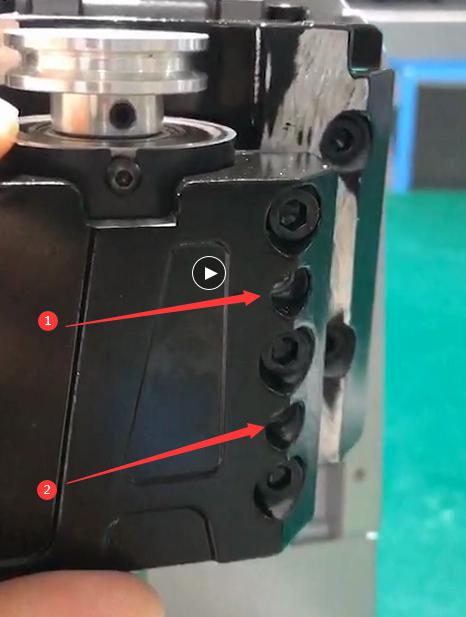
Unscrew the three screws on the Z-bearing,
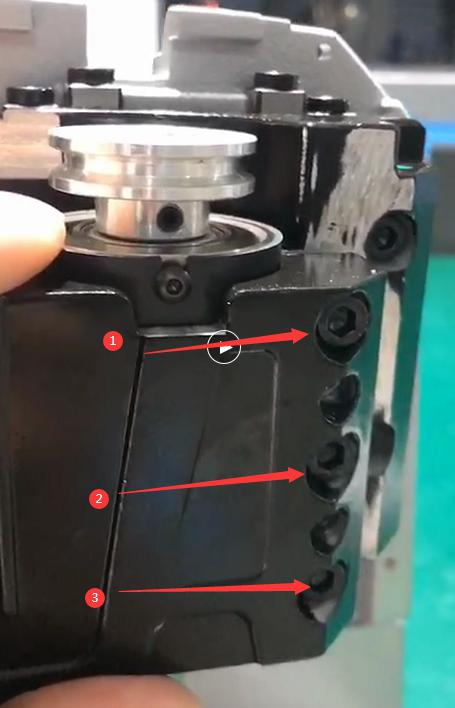
and fasten the two screws until we get a gap to take down the Z-bearing.
Press the cutter’s hole and push the bearing up.
Check if the white paper is broken.

If so, replace it.
If not, check if there are iron filings inside the bearing hole, then clean them
Done!